To tune your drums, all you need is a drum key - although a DrumDial can’t hurt to really nail it.
Tuning your drums will ensure they sound and play the way you want them to - to the best of their ability. This can make even the cheapest, most run-down kit sound professional (and neglecting tuning can make the priciest kit sound like hot garbage). Here, we’ll cover not just the how-to of drum tuning, but the tricks that can maximize the quality of sound from your kit.
When you’re done reading, you will be familiar with:
- Have a Goal - What’s Your Sound?
- Start With Quality Heads
- How to Tune Toms
- The Quagmire of the Kit: Tuning the Snare
- Tuning Your Kick
- Some Quick Hacks
- Common Problems (and How to Fix Them)
- Tuning in a Nutshell
- FAQ
Have a Goal - What’s Your Sound?
Before you even start tuning your kit, you need to decide how you want your drums to sound. There’s generally a few different approaches that drummers tend to prefer:
- A punchy sound that cuts, perfect for rock and metal. You’ll want drums with plenty of attack, but with little sustain.
- A very dry, 70’s-inspired funky sound - non-existent sustain, and all attack (but a very contained attack).
- An open, free-to-ring kit tuned high for jazz - plenty of sustain, and an attack that’s less punchy, but still there.
You can also opt for a more all-around sound.
BUT: No matter what your style, you need your drums to be in tune with themselves and each other, without unpleasant overtones. The best way to do this is to start with high-quality heads.
Start With Quality Heads
One of my biggest flexes is playing countless shows with a cheap drum kit that sounds great, and I bought it for less than the heads I put on the kit.
As mentioned earlier, great heads make a huge difference in the sound quality of your kit. Also, the stock heads that come with any kit are made by the drum manufacturer, and are far worse than top quality brands - these include Remo, Evans, and Aquarian.
You’ll want to pick which specific heads you want based on the sound you’re going for (extra dry and punchy heads will be good for rock - like the Evans EC2s or Hydraulic models, while “ringier” calfskin heads might pair well with a jazz kit).
How to Tune Toms
The toms are a great place to start for tuning your drums; proper tom tuning is essential for a pleasant-sounding kit, but is relatively straight-ahead.
As mentioned before, we can decide the tension of these drums based on the style we want to play; a thuddier, deader sound can be achieved with a lower tension on the “batter” head (the side of the drum that you hit), while a sound with more sustain can be made with higher tension (you’ll get more tone and ‘pitch’ out of the drum as well). Lower tension means you’ll need to work harder to bring the sticks back upon rebound, and higher tension will make the sticks bounce back quicker.
Either way, we want the drum to be in tune, regardless of what kind of tone we want. Let’s cover this process step by step:
Put both Heads on the Drum
Or, if they’re already attached to the drum - loosen them completely to start from scratch. Then, screw in all of the lugs by hand until they’re finger tight. Once both the “batter” and “resonant” heads are on the drum and finger tight, you’re ready to tune (just a reminder - the “batter” head refers to the one on the side of the drum that you hit, and the “resonant” head goes on the opposite side). Heads are sold as “batter” and “resonant” heads, so make sure you put a batter head on the side you want to hit, and a resonant head on the other side.
Get Rid of the Wrinkles in the Head
You might not have any at this point, in which case, great! But, wrinkles can be a symptom of both uneven tension, or just not enough tension overall (which can obviously happen when the heads are only finger-tight). Anytime we do any tuning, it’s recommended to tune our lugs in a star-shaped pattern! Like so, criss-crossing across the drum to avoid overloading any one side with too much tension too quickly:
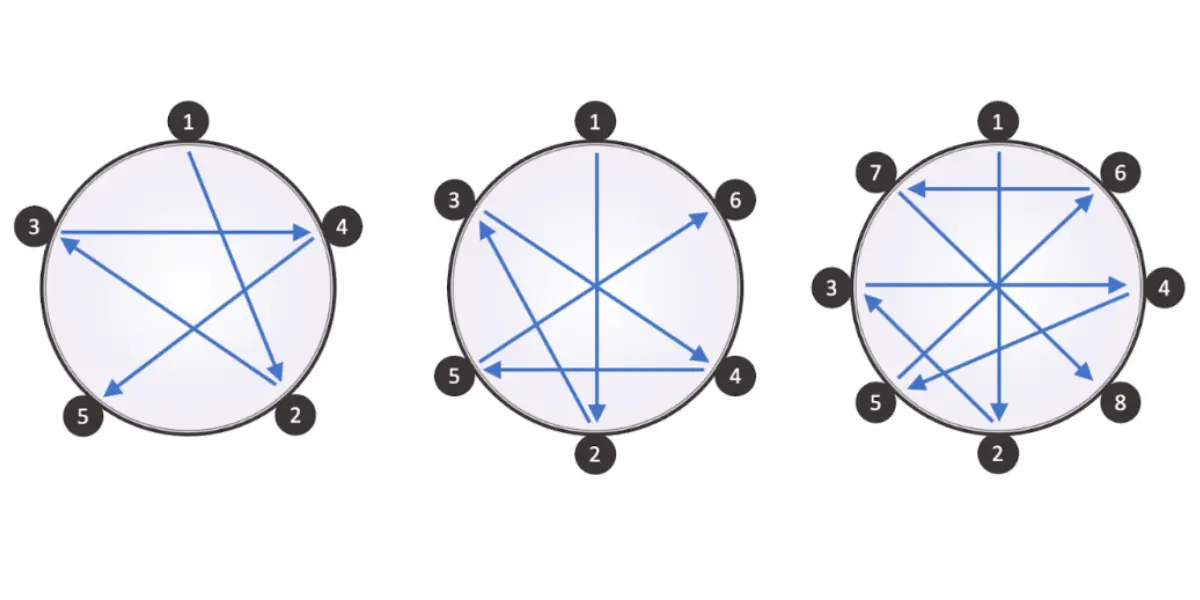
(The star-shaped pattern criss-crossing across drums with a different number of lugs)
This isn’t completely necessary, though. Some drummers get a great sound by simply pressing their hand in the middle of the drum, creating wrinkles, and then tightening each lug until the wrinkles disappear. This is a quick way to get an even, in-tune sound on both drums (especially on a lower-pitched, rock kit). But if we want a nice, in-tune sound on higher-pitched, more resonant jazz kits, we’ll need to go a bit more in-depth.
Getting Toms Pitched
Once you’re in the ball-park with your batter head at least finger-tight - gently lay your pointer finger in the middle of the drum, and tap the edges of the head next to each lug (or “tension rod”). Your finger will cut out some of the more confusing overtones, and you’ll be left hearing the fundamental pitch at each lug. Use your drum key to make these pitches equal to each other, focusing on the lower-pitch spots and tightening there (instead of loosening at the higher-pitched spots). If you have a DrumDial, you can even use that to make sure the actual tension is equal in each spot. It’s recommended to tune your resonant head a bit higher than the batter head.
The Quagmire of the Kit: Tuning the Snare
The snare drum is arguably the hardest drum to tune - and also the most important. The snare drum provides your backbeat in many genres of music, and is a huge factor in jazz as well. But, the very snares that give this drum its signature “crack” are what make the tuning of this drum so difficult.
Resonant Head Madness
The snare is such a pain to set up and tune because of the snares themselves. They are strapped to the resonant head, so even putting this head on is annoying. Chances are, there was a resonant head on your snare when you got it, so, if you need to replace it, you’ll need to remove the snares. However, resonant heads on any drum require less replacing, tuning, and attention to detail than the batter heads - so you might be able to get away with just tuning these heads. If not, here’s how you replace a snare batter head:
- Remove the snares - they will be attached to the side of the snare drum using similar lugs to the ones you see on the rims of your drums
- Then, replace the head as you would a tom head

(What the snare attachment looks like - you’ll need to loosen the lugs on the side of this snare switch to remove the snare and the strap fastened into these lugs)
- Finally, reapply the snares to the head - we can always switch the snares “off” and put a drumstick between the snares and the resonant head for tuning purposes later.
Repeat the Process You Did on Your Toms
Tuning the snare is just like tuning your toms, with a few important exceptions. You’ll repeat the same process, with the snares turned off as you work on the batter head to more clearly hear the pitches you want. Even if you want a fairly low-pitched snare, for lazy, thick grooves, you’ll still want more tension across the board than you do in your toms.
Generally speaking, you’ll want a very highly-tuned, or “cranked” resonant head. This will help the snare engage with the snares without ending up with a “tinny” or “dull” sound. If you end up with too many harsh overtones, try loosening just the lugs on the resonant head that surround the snare wires. As with all of these adjustments, less is more (i.e. go for ¼ and ½ turns to start).
Tuning Your Kick
The kick is arguably the easiest to tune, especially if you put a pillow or blanket in there to help deaden the sound (as many drummers do - including myself). For a punchy tone, the looser the better - just get rid of all the wrinkles in the batter head. If you have a pillow in your kick, a tighter batter head will still sound punchy, and be a bit easier to play. For a more open, jazzy sound, you’ll simply need to follow the process for tuning toms; it will be harder than tuning a punchy “rock” kick, but there’s still more room for error on a kick than toms.
Some Quick Hacks
Many drummers use additional tools to enhance their sound. Most of these are DIY muffling techniques, since these cut down on undesirable overtones - but some hacks also augment the sound of the drums. These can include:
- Bandanas on the toms and snare - this highly mutes the drums for that dry, 70s-inspired sound made for a sample pack
- A more subtle muting can be done with moongels, off-brand gel toys, or simple duct tape
- A wallet on the snare drum to lightly mute it - this is a classic move, but it can be hard to keep the wallet on the snare for heavy hitters
- Yet another form of muting can be done with the “Big Fat Snare Drum” product line, which not only mutes the drum you put it on, but also “fattens” the sound while deadening it
- You can even recreate one of these DIY-style by simply ripping the center out of an old drum head and placing it on top of the drum you’d like to mute (or check out Remo “O-Rings” for a similar effect)
- For an extra-high-frequency attack on the kick, some metal drummers have taped a credit card over the kick drums center (where the beater hits the head)
- To take this effect to 11, some drummers even use electronic triggers on all their drums - this adds “samples” that play through the speakers to over the drummer’s actual notes for live shows
Another quick hack - the Drum Dial! As mentioned before, this little tool will tell you exactly how much tension each lug has, and you can get a great sound by matching these without relying on pitch! However, your best tool will still always be your ears, so let them have the last word.
Common Problems (and How to Fix Them)
Perhaps you followed all of these step-by-step guides and your drums sound like garbage. What gives? Oftentimes, we’ll fall into these traps - but they’re all easy to escape!
Toms Have a “Dive-Bomb” Sound
This can best be described as a quickly decreasing pitch of the tom, in an over-the-top, long-lasting fashion (with a side of “distortion” to the sound). We want a little of this effect on our toms, but more in-check.
This can be due to the tom being out of tune, or also just a bit too loose for the size of the drum or head. Check your tuning - most likely you need to tighten certain lugs slightly.
Snare Has an Overbeating “Ping”
This is likely due to an overly cranked batter head. Some people want this sound, but others hate it. Simply loosen the batter head - it will still “cut” through just as much as this cranked snare does. Also, try to prevent this from happening in the first place, as it can make the head unfixable.
Toms or Kick sound like a Paper Bag
This again is due to an overly-loosened batter head - likely to the point where one or more lugs is no longer even finger-tight. If you like your drums tuned low and play hard, this can happen over time as you play. Check on your lugs and re-tune them.
Tuning in a Nutshell
Drum tuning is a daunting task, largely due to the host of overtones each drum has (and the fact that we generally think of drums as an “unpitched” instrument, even though that’s not totally true). Fine-tuning is more difficult and important on a small, jazzier kit with more sustain and pitch than a heavier rock kit. - but the process is essentially the same. And, just a reminder - high-quality, new heads are your friend, and will make the process a lot easier.
FAQ
I followed your instructions but my drums sound bad - Why?
Each drum has a range of pitches it can tune to - and higher quality drums (and, more importantly, heads) can increase this range. There’s a chance that you followed these instructions perfectly, but it still might be hard to get a giant, cheap rock kit to sound like a compact jazz kit. Still: new, high-quality heads should cover just about any sound and style, and choosing the right heads for your style will help immensely.
Why do my drums detune unevenly as I play?
This might not be a frequently asked question, but it should be. If you play hard, and do lots of rimshots, the snare lug closest to where you hit may loosen quickly (the same can go for your toms). Check on that one first, but simply rechecking all of your lugs on each drum regularly is advised.
I tried a different method and my drums sound good - is that okay?
Of course! There’s more than way to tune a drum, and the easier, the better! If things go out of whack over time, it’s still a good idea to try our troubleshooting methods above.


