Pro-level hand speed comes from building a relaxed, correctly positioned fulcrum, then training your wrists and fingers to work together in isolation before combining them into a smooth, repeatable rebound stroke. Speed itself is never the starting point - it's the byproduct of control.
This post is a full write-up of our free live workshop, PRO-Level Hand Speed, where we broke down exactly what separates a beginner or intermediate player's hands from a professional's. It's not about how many rudiments you know or how many hours you clock on the pad - it's about a small number of foundational details that most drummers skip past, and that skipping is usually what caps their speed for years.
Below, we'll walk through the fulcrum, the three "gears" your sticks move through, the wrist and finger isolation exercises used to build each gear individually, the drop catch drill that brings them back together, and how to progress your tempo without hitting a wall. We'll also cover the most common technical issues that show up when drummers try to build speed the wrong way, along with practice tips and answers to the questions that came up during the live Q&A. If you'd rather watch the whole thing in action, the full recording is linked at the end of this post.
When you’re done reading, you will be familiar with:
- What "Pro-Level" Hand Speed Actually Means
- It All Starts With Your Fulcrum
- The Three Gears: Fingers, Wrists, and Arms
- Wrist Development: Isolating the Wrist
- Finger Dribbling: Building Finger Control
- The Drop Catch: Bringing Wrists and Fingers Together
- How to Progress Your Tempo Without Hitting a Wall
- Hand Speed Isn't Just for Metal
- Common Mistakes That Hold Back Hand Speed
- Practice Tips for Building Hand Speed
- FAQ
- Watch the Full Workshop Recording
What "Pro-Level" Hand Speed Actually Means
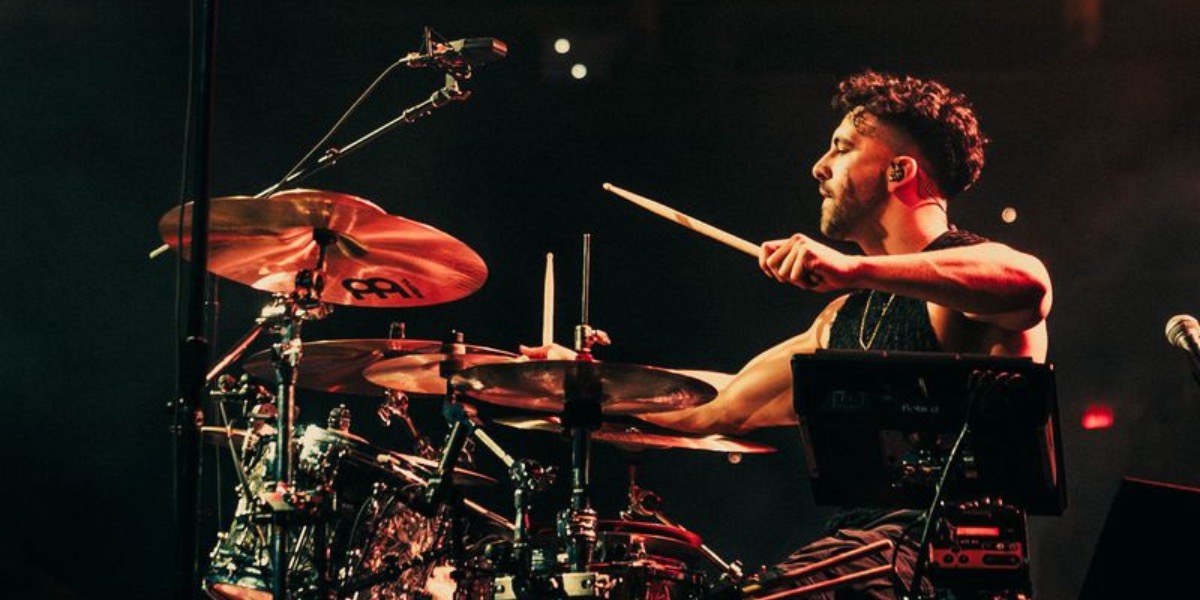
Playing faster is easy to say and hard to actually build. The difference between beginner or intermediate hand speed and pro-level hand speed isn't really about raw velocity - it's about three qualities: consistency, control, and effortlessness. Effortless doesn't mean zero physical exertion - playing fast metal patterns is still demanding - but it should look and feel smooth rather than strained.
A professional drummer isn't thinking about their grip or their technique mid-performance. Their hands have already internalized the mechanics, which frees up their attention for the actual music. That's the real target here: getting your technique so consistent that it disappears into muscle memory, leaving you free to focus on the performance instead of the mechanics behind it.
It All Starts With Your Fulcrum
Everything about hand speed starts at the fulcrum - the point where your thumb and index finger hold the stick. Get this wrong and every other technique you build on top of it will fight you.
Here's the correct starting position: find the last knuckle of your index finger and rest the stick there, with your thumb placed on top. You should see a little bit of wood below your grip and a small gap above it. Don't creep your grip up higher on the stick - that's a common habit that creates tension.
The reason this specific spot matters comes down to relaxation. If you open your hand and bring your thumb and index finger together right at the fingertip, that's the position of least tension. As you slide your thumb further up your index finger, tension builds. Now imagine holding that tension for an entire set while also moving your wrists and forearms around the kit - it's a recipe for fatigue, blisters, and a hard ceiling on your speed.
The Fulcrum-Strength Exercise
One of the simplest ways to build fulcrum strength is also one of the least glamorous: hold the stick only between your thumb and index finger, in the same relaxed, low position described above, with your other three fingers held away from the stick entirely. From there, snap your wrist to bounce the stick off a practice pad.
Because your fulcrum is in its weakest possible position - if you let go, the stick drops - this isolates and strengthens exactly the muscles that hold everything together. It's an intentionally "dumb" exercise, but it's foundational. Everything else in this post builds on top of it.
Keep in mind that your fulcrum won't look identical once you're playing behind a full kit. As your hands move through different techniques and positions, the exact contact point will shift slightly - that's completely normal. The fundamentals stay the same even as the visual appearance of your grip adapts to what you're playing.
The Three Gears: Fingers, Wrists, and Arms
There are three points of rotation that move a drumstick: your fingers, your wrists, and your arms. For building hand speed specifically, the arms aren't the priority - the wrists and fingers are where nearly all of the real development happens.
Once your fulcrum is set, seal the stick lightly against your palm using your back three fingers (middle, ring, and pinky). You're not squeezing hard enough to turn your knuckles white - just enough pressure to keep the stick in contact with your palm. This starting position is what allows you to move fluidly between grips and techniques as you build speed.
Wrist Development: Isolating the Wrist
With your fulcrum set and the stick sealed to your palm, the next step is training the wrist in isolation - meaning the wrist is the only thing generating movement, with no help from your fingers.
You'll know you're isolating correctly if there's no gap ("air") between the back of the stick and your palm as you play. If your fingers are working with your wrist to move the stick, you'll see space open up in the back of your grip - which isn't wrong, exactly, but it defeats the purpose of a pure wrist-isolation drill. If you stop moving your wrist and the stick stops entirely, you're isolating correctly.
To practice, pick a simple, repeatable pattern - eighth notes and sixteenth notes work well - and play it at one consistent dynamic level. This detail matters more than it sounds like it should: most drummers unconsciously play their eighth notes big (since they're the slower note value) and their sixteenth notes small (because they can't yet control them at a bigger stick height). Pick your maximum comfortable stick height based on your fastest controlled note value, and keep every note at that same height. That consistency is what separates pro-level control from a shaky "eyeballed" performance.
Play these patterns slowly, without rushing toward speed. Speed is a byproduct of control, not the other way around - a phrase worth keeping in mind any time you're tempted to skip ahead. Rather than jumping between exercises, take a small handful of drills and repeat them daily for 30, 45, even 60 days. Consistent repetition over time is what actually rewires the movement into your hands; switching exercises constantly out of frustration just resets the clock.
Finger Dribbling: Building Finger Control
Finger dribbling gets a bad reputation because, on its own, it doesn't look like anything you'd actually play behind a kit. That's not the point of it. Its real purpose is to build the feel of your fingers staying engaged with the stick, so that your fingers can properly support your wrist during a rebound stroke.
Without that support, drummers tend to "knuckle" the stick - gripping with a closed fist and relying almost entirely on the wrist and arm. That approach caps both your speed and your stamina. Finger dribbling trains the fingers to work with the wrist so you can access a genuinely efficient rebound stroke, which matters even at moderate tempos, not just at extreme speed.
How to Practice Finger Dribbling
- Start in the air. With your fulcrum set, hold the stick up off the pad and simply wiggle it using your fingers.
- Move to hovering over the pad. Keep wiggling, now positioned just above the surface. It's fine if your fingers slide around the stick at this stage - that's part of learning the motion.
- Dribble on the pad. Let the stick actually bounce off the pad using finger motion, similar to dribbling a basketball.
As you do this, your thumb and index finger play two roles: they hold the stick, and - until you bring your back three fingers in - they're also the source of the stick's motion. Once your back three fingers engage, the movement should originate from them instead, with your thumb and index simply reacting to the motion rather than driving it. You'll know your thumb and index aren't interfering if, when you stop dribbling, the stick gradually decelerates and comes to a natural stop. If there's unnecessary tension in your thumb and index, the stick will instead snap back to center the moment you stop.
Avoid "slapping" the stick, where your fingers come off the stick entirely between bounces and reintroduce momentum abruptly - like slapping a basketball instead of dribbling it smoothly. Your fingers should stay in contact with the stick throughout, chasing its natural bounce rather than interrupting it.
A Progressive Finger Dribbling Pattern
Using a simple eighth-note pattern at one consistent dynamic, work through this five-bar sequence:
- Bar 1: Thumb and index only
- Bar 2: Add the middle finger
- Bar 3: Add the ring finger
- Bar 4: Add the pinky
- Bar 5: All fingers together, then return to thumb and index for bar 1 and repeat
Because finger dribbling relies on momentum, you can afford to start it faster than most other isolation drills - somewhere around 90 to 110 BPM in eighth notes is a reasonable starting point. Expect it to feel chaotic at first. Your fingers will creep up the stick, your grip will fall apart, and you'll drop the stick more than you'd like. That's a normal part of the process, and pushing through it is what eventually gets it into your hands for good.
Building Up Your Weaker Hand
If your weaker hand is lagging noticeably behind your stronger hand, give it more repetitions rather than trying to force it to catch up all at once. A simple way to do this: play one bar of eighth notes with your strong hand, followed by two bars of eighth notes with your weaker hand, and repeat. The weaker hand consistently gets more "reps" without ever falling out of rhythm with the exercise.
Once you can play these patterns cleanly around 120-130 BPM, you can stop cycling through individual fingers one at a time and move to using all fingers together continuously. That's the point where you start climbing the tempo ladder in earnest.
The Drop Catch: Bringing Wrists and Fingers Together
Once your wrists and fingers have been trained in isolation, the drop catch drill is what brings them back together into one coordinated stroke.
Step 1: The Grip Reset
Rest the stick on your practice pad at a downward angle, then place your thumb on top and slowly apply pressure until the stick sits parallel to the floor. This gives you an easy visual check on your squeeze: if the stick rises above parallel, you're squeezing too tight; if it stays below parallel, you're squeezing too loose. Parallel means you've found the right amount of tension.
Step 2: Rotate Into Position
From this French grip position (thumb facing up), rotate your wrist so your palm faces down, without letting your arm swing out to compensate. You can check your squeeze by rotating your wrist in and out - the butt of the stick should stay lightly against your palm throughout. If it comes off your palm as you rotate, you're squeezing too loose; if it feels locked rigid, you're squeezing too tight.
Step 3: Raise, Drop, and Let It Bounce
From this position, raise your wrist, then drop it and let the stick bounce naturally rather than forcing it back down. Repeat this raise-and-drop motion, gradually introducing more space so the first bounce becomes more pronounced.
Step 4: Catch It With Your Fingers
Once you can consistently produce that pronounced first bounce, use your back three fingers to stop the stick at the top of that bounce. This is the most critical position in the whole exercise - from here, you can pause indefinitely without losing control, because all that's left to do is close your fingers to complete the stroke.
As you speed this sequence up - reset, raise, drop, catch, close - you're training your wrists and fingers to move together in rhythm instead of as separate, exaggerated motions. That coordinated movement is the actual rebound stroke you'll rely on once you're playing at speed behind a full kit.
How to Progress Your Tempo Without Hitting a Wall
Once you can play a new technique cleanly and consistently - for example, two full minutes without mistakes at a given tempo - resist the urge to jump the metronome up by 5 or 10 BPM. Increase in small steps of about 2 BPM at a time.
Large jumps tend to skip over what could be called transition tempos - narrow speed ranges where your current technique starts to break down before a more efficient one has kicked in. Double bass drummers run into this constantly: there's often an awkward zone, roughly 140-165 BPM in sixteenth notes, where ankle technique and swivel technique both feel slightly wrong before one of them clicks into place. The same kind of transition zone exists for hand technique. Small, incremental tempo increases let your technique adapt gradually instead of hitting a wall and reverting to sloppier habits under pressure.
The upside of this patience is durability: once you've built a tempo increase this way, it tends to stay built. You've spent enough repetitions at each step that the movement is genuinely in your muscle memory, rather than something you can only just barely execute under ideal conditions.
Hand Speed Isn't Just for Metal
Hand speed training gets associated almost exclusively with metal drumming and blast beats, but that undersells what it's actually for. The same wrist-and-finger coordination that lets you play a controlled blast beat also shows up in fast, textured doubles on a groove, in a snare buildup, or in ghost-note-heavy fills across completely different genres.
Pro-level hand speed is really pro-level control. If you can access your wrists and fingers together with consistent dynamics, you gain more options everywhere on the kit - not just at extreme tempos. A drummer who never plays anything close to a blast beat still benefits enormously from this foundation, because it's what makes fills, dynamics, and subtle textures feel controlled instead of accidental.
Common Mistakes That Hold Back Hand Speed
These are the issues that show up most often when reviewing footage of drummers working on their hand speed.
Relying on Arm and Wrist Movement Instead of Finger Control
Why it's wrong: When the fingers aren't engaged with the stick, the hand tends to stay open while the arm and wrist do most of the work. This limits both speed and fluidity, since the fingers are what allow a smooth, efficient rebound stroke.
How to fix it: Build wrist-and-finger coordination deliberately through finger dribbling and the drop catch drill. It takes real time to develop that level of articulation, but it's directly responsible for smoother, faster, more controlled playing.
A Loose, Unlocked Fulcrum
Why it's wrong: If the stick is visibly shifting around at the top of your hand instead of staying anchored at your fulcrum, you're leaving control and speed on the table - even if the playing looks relaxed. A weak fulcrum undermines everything built on top of it.
How to fix it: Return to the fulcrum-strength exercise and rebuild that locked contact point. Being relaxed and having a locked fulcrum aren't in conflict - the goal is smooth, controlled playing, not white-knuckle tension.
Fingers Lifting Off the Stick
Why it's wrong: When one or more fingers - the pinky is the most common culprit - repeatedly comes off the stick during a stroke, you lose the consistent finger contact that finger dribbling is designed to build, which caps your control at higher speeds.
How to fix it: Go back to finger dribbling and the drop catch, focusing specifically on keeping every finger in light, constant contact with the stick throughout the motion.
Compensating With a "Back Fulcrum"
Why it's wrong: Some drummers unconsciously shift to holding the stick primarily with the back three fingers while the thumb-and-index fulcrum stays loose. This often develops as a workaround for tension or cramping caused by a poor fulcrum in the first place. It can work in a pinch, but relying on it as your default grip makes real hand speed development very difficult.
How to fix it: Address the fulcrum directly rather than working around it. Once the fulcrum is solid, the back three fingers can do their actual job - supporting and refining the stroke - instead of compensating for a weak contact point.
Practice Tips for Building Hand Speed
- Film yourself from the side, and review it after your session - not during it. Watching your hands mid-practice tends to create obsessive over-correction and pulls focus away from actually working through the exercise. Reviewing footage afterward gives a much more realistic picture of your progress.
- If you're balancing technique work with song prep for gigs, prioritize the gig material first. A reasonable split within a practice session is roughly 60% song work and 40% technical work, adjusted based on how close you are to a performance. On lighter weeks, you can dedicate an entire separate practice block purely to something like finger dribbling.
- A shifting fulcrum at speed is normal. As you play faster, the gap between your thumb and index finger will naturally tighten. That's not a problem as long as your main contact point stays near the last knuckle of your index finger and nothing about it causes pain.
- Build fill and groove vocabulary by drilling rudiments until they're automatic - not by trying to freestyle immediately. A good test: if you can hold a conversation while playing a rudiment on the pad, it's automatic enough to start applying. From there, move it around the kit gradually - one hand first, then two, then more limbs - until you've built a "bank" of patterns you can draw on freely and combine on the fly.
- Build confidence by testing your foundation at very low tempos, then climbing gradually. Take the techniques and patterns you're unsure about and play them at something like 50 BPM. If you can hold that cleanly for two minutes, move up a couple of BPM and repeat. This process either reveals specific gaps in your playing or reinforces the building blocks of real confidence - both are useful outcomes.
FAQ
How much of my practice time should go to technique versus songs?
If you have upcoming gigs, prioritize the material you need to perform. A workable starting split is around 60% song practice and 40% technical work within a session, adjusted for how close you are to a performance. If your setlist is already solid, you can dedicate more standalone time to technique work like finger dribbling.
Is it normal for my grip to shift slightly as I play faster?
Yes. The gap between your thumb and index finger will naturally tighten as tempo increases. This isn't a problem as long as your main contact point stays close to the last knuckle of your index finger and you're not experiencing pain.
How do I build more fluid vocabulary and fills around the toms?
Start by drilling rudiments and sticking patterns on a practice pad until they require no conscious thought - a good benchmark is being able to hold a conversation while playing them. Then begin moving them around the kit deliberately, starting with one hand, then two, then adding more limbs. Over time, this builds a bank of patterns you can access freely rather than having to consciously construct fills in the moment.
How can I build more confidence in my live playing?
Confidence tends to come from disproving self-doubt through repeated, deliberate action rather than positive feedback alone. Take the specific techniques or patterns that make you feel shaky and test them at a very low tempo, like 50 BPM, building up in small increments only once you can hold each tempo cleanly for a couple of minutes. This process exposes exactly where your foundation needs work, which is usually far more useful than general reassurance.
Am I too old or too late to start improving my technique?
No. Plenty of drummers start building serious technique in their 50s, 60s, and beyond. The same fundamentals - fulcrum, wrist isolation, finger dribbling, drop catch - apply regardless of when you started playing. Just be mindful of any physical limitations and adjust intensity so you can keep progressing long-term without irritation or strain.
Do I need to play metal to benefit from hand speed training?
No. While hand speed is closely associated with metal and blast beats, the underlying skill is really about control - consistent dynamics and coordinated wrist-and-finger movement. That shows up in fills, ghost notes, and textured grooves across every genre, not just fast, aggressive playing.
Watch the Full Workshop Recording
Reading through the technique is a great start, but seeing the fulcrum position, the finger dribbling motion, and the drop catch demonstrated in real time will make all of this click much faster. Watch the full PRO-Level Hand Speed workshop recording above for the complete, live walkthrough - including the student video breakdowns and full Q&A referenced throughout this post.